Seed Storage & Germination
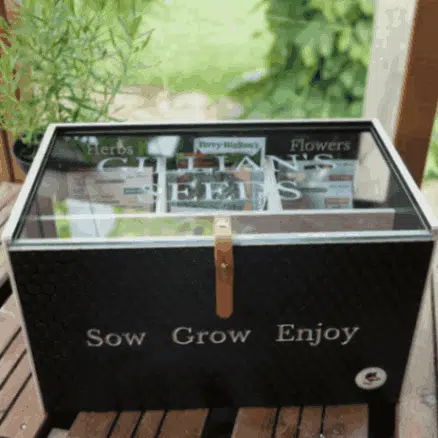
Seed Storage 🌱
Good seed storage is one of those simple gardening jobs that is easy to overlook. We carefully choose the varieties we want to grow, sow them at the right time and fuss over the seedlings, but what happens to the seeds in between seasons matters just as much. Stored well, many vegetable, herb and flower seeds will remain viable for several years. Stored badly, the same seeds can lose germination surprisingly quickly.
Seeds might look completely lifeless while they are sitting in a packet, but they are actually living organisms in a dormant state. Inside each seed is a tiny embryo along with enough stored energy to get that new plant started. While the seed is dormant, its life processes slow right down, but they do not stop altogether. Heat and moisture speed up the ageing process, which is why storage conditions have such an influence on how long a seed remains viable.
For most home gardeners, there is no need for complicated equipment. The basic rule is wonderfully simple: keep your seeds cool, dark and dry. 🌱
If you can manage those three things, you are already doing most of what is needed to keep your seed collection in good condition.
What causes seeds to lose their germination?
Every variety has its own natural storage life. Some seeds are quite forgiving and can still germinate well after several years, while others gradually deteriorate much sooner. Onion and parsnip seed, for example, are generally considered shorter lived than tomato, cucumber or many brassica seeds. Seeds with a higher oil content can also have a naturally shorter storage life because those oils gradually deteriorate over time.
The age printed on a seed packet therefore only tells part of the story. How the seed has been stored is just as important as how old it is.
Heat is one of the biggest problems. A packet of seed stored in a cool cupboard inside the house can remain viable considerably longer than exactly the same packet left in a garden shed through an Australian summer. Even if the shed is dry and dark, temperatures can climb dramatically during the day. That repeated heating speeds up the natural deterioration occurring inside the seed.
Moisture is just as important. Seeds need moisture to begin germination, so allowing stored seeds to repeatedly absorb humidity can slowly bring them out of their deeply dormant state. Moisture also increases the risk of mould and fungal damage. If seeds are exposed to warm, humid conditions at the same time, deterioration can happen even faster.
Light is generally less of a problem than heat or moisture, but keeping seeds somewhere dark protects them from direct sun and helps maintain more stable conditions. This is why the old-fashioned seed tin or seed box kept in a cool pantry actually works very well.
Where is the best place to store seeds? 🏡
If you are planning to sow your seeds within the next month or two, there is usually no need to do anything elaborate. Leave them in their original packets and keep them somewhere cool, dry and out of direct sunlight.
A pantry, cupboard, drawer, wooden seed box or cardboard storage box can all work perfectly well. What matters more than the container itself is the environment around it.
I would avoid keeping seeds near ovens, hot water systems, sunny windows, heaters or other appliances that produce warmth. Damp laundries and bathrooms are not ideal either. Outdoor sheds can be particularly hard on seeds because they often experience huge temperature changes between day and night.
It is also worth considering insects and rodents. A quiet box of packets tucked away for six months can be remarkably attractive to mice. If that is a possibility where you store your gardening supplies, a sturdy container with a secure lid is worth using.
For seed that will be stored longer, I prefer an airtight container. This could be a sealed plastic canister, glass jar, biscuit tin with a good seal or another food-safe storage container. The purpose is mainly to stop humid air continually moving in and out around the seed packets.
You do not need to remove the seeds from their packets. Put the whole packet into the airtight container so that the variety name, planting information and other details remain with the seed.
Keeping moisture away from stored seeds 💧
If you want to keep seeds for more than a few months, adding a moisture absorber to the storage container can be useful, particularly in humid conditions.
Silica gel packets are an easy option. Clay-based moisture absorbers such as Esorb can also be used. Another old-fashioned trick is dried powdered milk. A small amount wrapped in tissue or another breathable material can help absorb excess moisture inside a sealed container.
The important point is that these products are there to deal with small amounts of moisture in the air. They cannot compensate for seed that was damp when it was packed away.
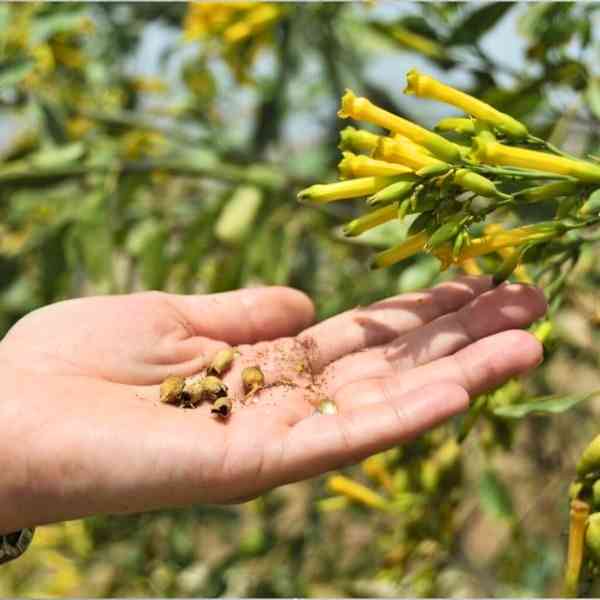
This becomes especially important when you save seed from your own garden. Commercial seed has normally been dried before it reaches you, but freshly harvested seed needs to be thoroughly dry before it goes into long-term storage.
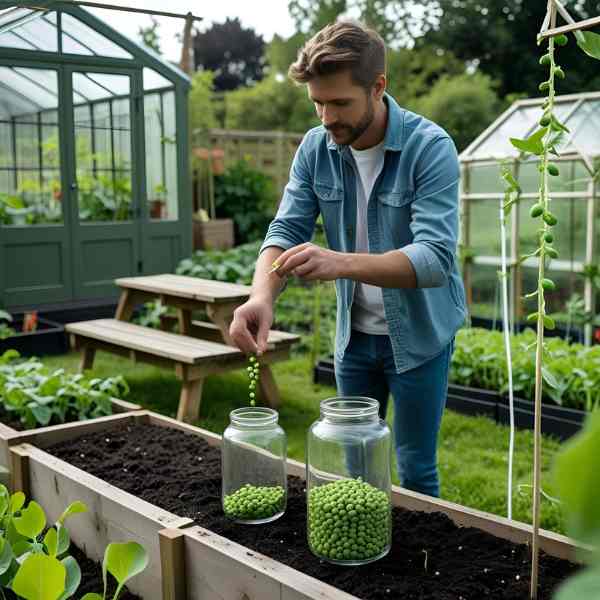
Beans and peas are fairly obvious because the pods become dry and brittle, but other seeds can still contain more moisture than you realise. Tomato seed, for example, needs to be cleaned and thoroughly dried after fermentation. Flower seed harvested from seed heads should also be given time to dry before it is sealed away.
If slightly damp seed is placed into an airtight container, the moisture becomes trapped with it. Instead of protecting the seed, the container can then create ideal conditions for mould.
So whenever you are storing home-saved seed, give it plenty of time to dry naturally in a protected, well-ventilated position before packing it away.
How long do seeds actually last? 🌽🥕🍅
This is one of those gardening questions where a chart giving exact numbers looks reassuring, but real life is not quite so tidy.
There are general expectations for different species, but there is no point at which a packet suddenly changes from good seed to bad seed. Germination normally declines gradually.
Imagine a fresh packet begins with a germination rate of 95 percent. After a few years it might have fallen to 80 percent. A few years later it could be down to 50 percent. The seeds have not all died on the same day. There are simply fewer viable seeds remaining in the packet.
This is why older seed does not automatically need to be thrown away.
If you sow twenty older seeds and fifteen grow, you still have perfectly useful seed. You simply need to sow a little more generously than you would with a fresh packet.
Generally, I like to use seeds within six to twelve months when possible because this gives the best chance of consistently strong germination. That does not mean the seed expires after twelve months. Many properly stored varieties remain viable for several years and sometimes considerably longer.
The type of seed, the quality of the original seed lot, how dry it was when stored and the temperature during storage all influence its lifespan.
Instead of worrying too much about an arbitrary expiry date, I find it much more useful to test older seed before throwing it away. A ten-seed germination test takes very little time and tells you far more than the date on the packet.
Storing seeds in the refrigerator ❄️
If you know you are going to keep seed for several years, refrigeration is one of the easiest ways to extend its useful life at home.
The important thing is not to simply put paper packets loose in the refrigerator. Refrigerators are cool, but they can also be humid. Instead, put your seed packets inside an airtight container with a moisture absorber, seal the container well and then place the entire container in the refrigerator.
The cool temperature slows the natural ageing of the seed, while the sealed container protects it from the moisture circulating inside the fridge.
Stored this way, many common garden seeds can remain viable for several years. You will sometimes see claims that refrigerated seeds will last five, seven or even ten years, but I would treat those numbers as a guide rather than a promise. Some varieties may last much longer, while naturally short-lived seeds may decline sooner.
There is one particularly important habit to get into when using refrigerated seed.
Allow the sealed container to reach room temperature before opening it.
If you take a very cold container out of the refrigerator and immediately open it in a warm room, moisture in the air can condense on the cold packets and seeds. It is the same thing that happens when you take a cold drink out of the fridge and water droplets form on the outside.
Leave the container sealed while it warms up. Once it has reached room temperature, open it and remove the packets you need.
If you regularly use refrigerated seed, it can also help to divide your collection into several smaller containers rather than keeping everything together. You might have one box for cool-season vegetables, another for warm-season crops and another for flowers. Then you are not constantly warming and cooling your entire seed collection simply because you wanted one packet of lettuce.
There is no perfect organising system here. The best one is the one that means you can actually find the seed when planting time arrives. Anyone who has ever found three packets of the same variety because they forgot they already owned it will understand that one. 😄
Should garden seeds be frozen? 🧊
For ordinary home seed storage, I generally prefer refrigeration rather than freezing.
This does not mean seeds cannot be frozen. Large seed banks around the world successfully preserve seeds at very low temperatures for decades. The difference is that those seeds are carefully dried to a particular moisture level and stored under tightly controlled conditions.
A household freezer is not quite the same environment. The door is opened regularly, temperatures can fluctuate and there is always the possibility of a power outage or someone accidentally unplugging the freezer. If the seed has not been dried correctly before freezing, moisture inside the seed can also cause problems.
For most gardeners, refrigeration gives excellent long-term storage without adding that extra complication.
There are also some species whose seeds do not tolerate drying and cold storage in the same way as ordinary vegetable and flower seed. These are known as recalcitrant seeds and are more common among certain tropical plants and trees. Most of the vegetables, herbs and annual flowers we grow from seed, however, produce what are called orthodox seeds, which cope very well with being dried and stored.
For a normal home seed collection, I would keep things simple and stick with cool, dark and dry.
A simple seed storage routine 🌿
You do not need to turn seed storage into another complicated garden job. A good routine can be as simple as:
- Keep seed packets in a cool, dark cupboard if you will use them reasonably soon.
- For longer storage, place packets inside an airtight container.
- Add silica gel, Esorb or another suitable moisture absorber if humidity is a concern.
- Make sure home-saved seeds are completely dry before sealing them away.
- Refrigerate seed you intend to keep for several years.
- Let refrigerated containers reach room temperature before opening them.
- Label home-saved seed with the variety and year collected.
- Keep an eye on older packets and test their germination rather than automatically throwing them away.
That last point is particularly useful if you grow heirloom and open-pollinated varieties. Some seeds disappear from catalogues for a while, and occasionally an older packet sitting quietly in your collection becomes much more valuable than you realised.
The Germination Test 🌱
Sooner or later, almost every gardener finds an old packet of seeds tucked away in a drawer and wonders whether it is worth planting. It might be a variety you particularly liked, something you saved yourself, or simply a packet that has somehow survived several reorganisations of the seed box.
Rather than throwing it away or sowing the whole packet and hoping for the best, you can do a simple germination test.
The idea is not complicated. You take a small sample of seed, give it suitable conditions for germination and see how many seeds grow. This gives you a reasonable estimate of the germination rate of the remaining seed.
It is particularly useful before the start of a planting season. If you discover that an old packet has very poor germination, you still have time to replace it before you need to sow. If the germination is still good, you have saved yourself buying seed you did not need.
How to do a germination test
Take a sheet of paper towel and lightly moisten it with a spray bottle. You want the paper damp enough to remain moist around the seeds, but it should not be dripping wet.
Place 10 seeds onto one half of the paper towel, leaving a little space between them. Fold the other half over the top so that the seeds are enclosed between the damp layers.
Place the folded towel inside a reusable silicone pouch, sealed container or zip-lock style bag. Seal it and label it with the variety name and the date.
Using ten seeds makes the maths wonderfully easy. If nine germinate, you have approximately 90 percent germination. Seven seedlings give you 70 percent and five give you 50 percent.
For most home gardeners, ten seeds provide enough information to decide whether a packet is worth planting. If you are testing a large quantity of valuable seed and want a more accurate result, you can test 20, 50 or even 100 seeds. The larger the sample, the more reliable the result.
Give the seeds the conditions they actually need 🌡️
This is where germination tests can occasionally give misleading results.
Seeds do not all want the same temperature.
Tomatoes, capsicums, eggplants and many other warm-season crops germinate best with warmth. Lettuce, peas and cool-season vegetables generally prefer lower temperatures. Some flower and native seeds have even more particular requirements.
So rather than automatically placing every germination test on the warmest shelf in the house, think about the normal germination requirements of the seed you are testing.
The top of the refrigerator has traditionally been suggested as a warm spot, although many modern refrigerators no longer produce much heat there. A comfortably warm room works well for many varieties, while a propagation heat mat is useful for seeds that really do appreciate warmth.
Light requirements vary too. Many vegetable seeds will germinate happily in darkness because they would normally be covered with soil. Some very small flower and herb seeds need light to germinate properly, while other species prefer darkness.
The aim is to give your test seeds roughly the conditions you would provide if you were sowing them normally.
How long should you wait? ⏳
Start checking the seeds after a few days, but do not expect every variety to behave like a radish.
Fast-germinating seeds can begin showing signs of life remarkably quickly. Radish, broccoli and many other brassicas may germinate within only a few days when conditions are right. Tomatoes commonly take a little longer. Some herbs and flowers can take several weeks, while certain native species can require considerably longer or need special treatments before germination occurs.
This is why a germination test should always be judged against the normal germination time for that particular species.
If nothing has happened after three days, it does not necessarily mean the seed is dead.
Check the paper towel regularly as well. It should remain moist throughout the test. If it begins drying out, lightly mist it again. Try not to make it soggy. Seeds need moisture to germinate, but they also need oxygen, and constantly waterlogged conditions can encourage rot or mould.
What counts as germination?
You do not need to wait until the seedling has leaves.
The first thing that usually appears is the tiny embryonic root, known as the radicle. Once that root has emerged from the seed coat, the seed has germinated and can be counted.
Keep recording newly germinated seeds until you have reached the normal germination period for that variety and it seems unlikely that any more are going to appear.
At that point, your ten-seed test gives you a very useful guide to how you should sow the remaining seed.
A result of 90 or 100 percent means I would sow the seed normally. Around 70 or 80 percent is still perfectly usable, but I might sow slightly more generously. At 50 percent, I would roughly double the number of seeds I sow compared with the number of plants I want.
Even very low germination can sometimes be worthwhile.
Imagine you have an old packet of an heirloom variety that has become difficult to find and only two seeds out of ten germinate. That is only a 20 percent germination rate, but those two seedlings could be all you need. Grow them successfully, save seed from the healthy plants and you have effectively refreshed your supply.
That is one of the lovely things about growing open-pollinated and heirloom varieties. 🌿
Can you plant the seeds from the germination test?
Yes. There is no reason those little seedlings have to go to waste.
Once a seed has germinated, carefully move it into seed-raising mix or into the garden if conditions are appropriate. The newly emerging root is extremely delicate, so handle it gently and avoid holding it by the root itself.
If possible, move germinated seeds fairly soon after the root appears. If they remain in paper towel for too long, the roots can begin growing through the fibres and become difficult to remove without damage.
Make a small hole in your potting mix, place the seedling into it with the root pointing down where possible, cover it gently and water carefully.
You may find that some of your best seedlings started life as nothing more than an experiment on a damp piece of kitchen paper. 🌱
Germination percentage is only part of the picture
While you are doing the test, pay attention to how quickly and strongly the seeds germinate, not just how many eventually appear.
Imagine two old packets both eventually produce eight seedlings from ten seeds.
In the first packet, most seeds germinate within a few days and produce strong, healthy roots. In the second packet, the seedlings emerge slowly over several weeks and some look weak.
Both technically have an 80 percent germination rate, but the first packet has much better seed vigour.
Vigour often declines as seed ages, sometimes before the final germination percentage falls dramatically. Fresh, vigorous seed tends to germinate more evenly and establish more strongly, particularly when outdoor conditions are less than perfect.
That does not mean older seed should be discarded. It simply tells you what to expect when you sow it.
When seeds fail in the garden, it may not be the seed
One of the most useful things about a germination test is that it can help solve another common gardening mystery.
You sow a row of seeds, keep checking every morning and eventually realise that hardly anything has come up. It is very easy to blame the seed.
Sometimes the seed certainly is the problem, but there are plenty of other possibilities.
The soil may have dried out just as germination began. Heavy rain may have waterlogged the bed. Warm-season seed may have been planted into cold soil. Tiny seeds may have been buried too deeply. Birds, mice, slaters or other garden visitors may have found the seed before it had a chance to grow. Very small seedlings can even emerge and disappear before you notice them.
A germination test helps separate seed viability from garden conditions.
If nine out of ten seeds germinate beautifully on damp paper towel but the same packet fails in your garden bed, the seed is probably fine. You can then look more closely at moisture, sowing depth, soil temperature or pests.
On the other hand, if none of the seeds germinate under suitable test conditions, the packet may genuinely have reached the end of its useful life.
Before giving up completely, especially with an unusual variety, I would check that the temperature was right, the towel remained moist and you allowed enough time. If you have plenty of seed, repeat the test. Seeds are living things and a second sample may occasionally give a slightly different result.
Test older seed before you need it 📅
One of the most useful times to check seed viability is a few weeks before your main sowing season.
Go through the seed box and pull out anything particularly old, anything that has been stored under questionable conditions or anything you simply cannot remember buying. Test those packets while there is still time to replace them.
It is much less frustrating than sowing a tray of twenty cells, watering it faithfully for two weeks and then discovering that nothing is going to happen.
You also do not need to test everything. If a packet is reasonably fresh and has been stored properly, I would simply sow it. Germination testing is most useful for older, valuable or questionable seed.
Good seed storage saves more than money 🌻
Storing seeds well certainly saves money because you do not have to replace perfectly usable packets every year, but there is another side to it that I think matters just as much.
Every packet contains a variety.
With heirloom and open-pollinated seeds, some of those varieties have been grown and passed between gardeners for generations. Others may disappear from seed catalogues for several years or become difficult to find.
Looking after the seeds we already have gives us the opportunity to grow those varieties again, save fresh seed and keep them circulating in gardens.
Fortunately, none of this needs to be complicated.
Keep your seeds cool, dark and dry. Protect them from humidity. Keep them away from excessive heat. Use airtight containers for longer storage, and refrigerate seeds you want to keep for several years. When refrigerated seed comes out, allow the sealed container to reach room temperature before opening it.
And if you come across an older packet and wonder whether it still has any life left in it, resist the urge to throw it straight into the bin.
Give it a germination test first.
Ten seeds, a damp paper towel and a little patience will usually tell you what you need to know. You might discover that the seed needs to be sown a little more generously, or you might find that a packet you thought was well past its best is still producing strong little roots.
Seeds can be remarkably resilient things. Give them sensible storage conditions and they may be ready to grow for a lot longer than you expect. 🌱🌼