


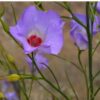
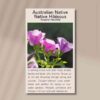

Native Hibiscus
$6.59
Alyogyne Hakeifolia
- Seed Count 50
- Sculptural Beauty
- Perennial
In stock
Description
The Native Hibiscus is a hardy Australian shrub that thrives in our sun-soaked soils and responds to a little care and patience with an abundance of flowers that stop you in your tracks. Native to parts of Western Australia and South Australia, this shrub is beautifully adapted to our climate and light conditions. Its an upright, bushy figure often growing to around three metres high, though it doesn’t mind staying a bit smaller in home gardens, especially if trimmed to shape.
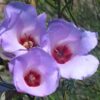
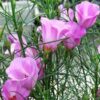
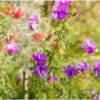
The leaves themselves are one of its most distinctive features. Slender and finely divided, they grow up to 10 centimeters long, almost like soft, green lace from a distance. There’s a bit of a wild tangle to them, which contrasts beautifully with the open simplicity of the flowers. But of course, it’s the flowers that steal the show. The blooms are large, deeply cupped, and composed of five broad petals that flare open generously, inviting bees, butterflies, and admiring humans alike. At the centre of each bloom sits a deep red eye, bold and velvety against the surrounding petals shaded in tones of purple.
Because of its origin in Western and South Australia, the Native Hibiscus is highly drought-tolerant once established, making it a brilliant choice for gardeners in arid or temperate zones, or anyone looking to create a waterwise garden that still feels vibrant and full of life. It’s also a reliable performer in sandy soils and light gravelly ground and the sort of conditions that can leave fussier plants throwing in the towel.
Its adaptability and visual impact have made it a favourite in native gardens, bush-style landscaping, and even more formal plantings where its tidy upright form can be used to good effect. It can be used as a hedge, a standalone feature, or nestled among rockeries and native grasses for a looser, more organic look. One of the additional joys of growing this shrub is the way it invites wildlife into the garden. Pollinators are drawn to the open flowers, especially bees and native insects that rely on flowering natives for food and habitat.
Despite its botanical name and resemblance to tropical hibiscus, Alyogyne hakeifolia isn’t a true hibiscus—though you’d be forgiven for thinking it was. Its flowers have that same soft, trumpet-like shape, and its overall appearance is just as striking. But as a member of the Malvaceae family, it’s part of a proud lineage of native bloomers that includes other beloved Aussie species. If you’re a fan of the bold flowers of hibiscus or hollyhocks but want something with more resilience and local character, this plant delivers in spades.
| Method: Start in trays | Soil Temp: 18°C - 24°C |
| Cool Mountain: Nov - January | Position: Full sun |
| Arid: Mar - May / Aug to Sep | Row Spacing: 1.5 m apart |
| Temperate: Sep - Dec | Planting Depth: 3mm |
| Sub Tropical: Aug - Nov | Harvest: 400 days |
| Tropical: May - Aug | Plant Height: 2.5 m |
🌺 Native Hibiscus Grow Guide
🌿 Overview
Native hibiscus is a beautiful flowering shrub grown for its soft foliage, large colourful blooms, wildlife value, and relaxed garden habit. Depending on the type, flowers may appear in shades of mauve, pink, purple, white, lemon, or soft lilac, often with a delicate papery texture and a bold centre. It is a lovely choice for cottage gardens, native-style borders, informal hedges, wildlife gardens, large pots, and mixed shrub plantings.
This plant is mainly grown as an ornamental and habitat plant. The flowers attract bees and other beneficial insects, while the shrub itself can provide shelter for small garden wildlife. It is generally easy to grow once established, but young plants benefit from good drainage, gentle watering, and protection while they build a strong root system.
Native hibiscus looks best when allowed to keep a natural, slightly open shape. Regular light pruning helps keep it bushy, but heavy clipping can spoil its graceful form.
🌱 Sowing in Trays vs Direct Sowing
Native hibiscus can be sown directly, but starting seed in trays, tubes, or small pots is usually the best method. The seed often has a firm outer coat, and germination can be uneven. Raising seedlings in a controlled setup gives better results because moisture, warmth, drainage, and pests are easier to manage.
For tray sowing, use a free-draining seed-raising mix. Individual tubes or small pots are even better than open trays because they reduce root disturbance later. Sow seed shallowly, cover lightly with fine mix, and water gently. The mix should stay evenly moist but never soggy. Heavy, wet mix can cause seed to rot before it sprouts.
Once seedlings are large enough to handle, pot them on carefully into individual containers. Allow them to develop a strong root system before planting into the garden. Young plants should be handled gently, as damaged roots can slow establishment.
Direct sowing can work in a prepared garden bed, especially where soil is loose, warm, weed-free, and protected. However, it is less reliable. Seeds may dry out, be eaten, rot in wet soil, or disappear among weeds. If direct sowing, sow more seed than needed and thin to the strongest seedlings.
For native hibiscus, tray, tube, or pot sowing is recommended because it gives stronger seedlings and far better control during the early stages.
💧 Seed Pre-Treatment
Native hibiscus seed usually benefits from pre-treatment because the seed coat can be hard and water-resistant. Without treatment, germination may be slow, patchy, or poor.
The most useful method is light scarification followed by soaking. Gently rub one side of the seed with fine sandpaper or carefully nick the outer coat with a small file. The aim is to weaken the seed coat slightly so water can enter, not to damage the inner seed.
After scarifying, soak the seed in room-temperature water overnight. Swollen seed can be sown straight away. Any seed that remains hard may be lightly scarified again and soaked once more.
A hot water soak can also be used, but it should be done carefully. Pour hot, not boiling, water over the seed and leave it to cool naturally. This helps soften the seed coat. If using this method, sow the seed promptly afterward.
Do not leave seed soaking for too long. Once seed has absorbed moisture, it becomes more vulnerable to rotting if it sits in water or wet mix.
🌞 Soil and Position
Native hibiscus grows best in well-drained soil with a loose, open structure. It can adapt to sandy loam, loam, gravelly soil, and improved clay, as long as water drains away freely. Heavy, wet soil is one of the main causes of poor growth and root problems.
Choose a position in full sun to light shade. In full sun, plants usually flower more heavily and grow with a stronger shape. In light shade, they may still grow well, especially where protection from harsh afternoon conditions is useful. Too much shade can lead to fewer flowers, softer growth, and a more open habit.
Before planting, improve the soil with compost or well-rotted organic matter, but avoid creating a rich, wet planting hole. The goal is balanced soil that holds some moisture but does not stay saturated. If the soil is heavy, plant on a low mound or raised bed to improve drainage.
For pots, use a free-draining native or low-phosphorus potting mix. Choose a container with excellent drainage holes and avoid saucers that keep the base sitting in water.
🌿 Care and Maintenance
Native hibiscus is fairly easy to care for once established. Water young plants regularly while they settle in, then gradually reduce watering as the roots develop. Deep watering is better than frequent shallow watering because it encourages stronger roots. The soil should dry slightly between watering rather than staying constantly wet.
Mulch around the plant to conserve moisture, reduce weeds, and protect the root zone. Keep mulch slightly away from the main stem to prevent dampness around the crown. Coarse mulch, leaf litter, or fine bark mulch works well.
Feeding should be light to moderate. Use a low-phosphorus native plant fertiliser or a gentle organic feed if growth is weak. Avoid heavy feeding, especially with high-nitrogen fertiliser, as this can produce lush leafy growth with fewer flowers.
Pruning helps keep native hibiscus bushy and attractive. Tip prune young plants to encourage branching. After flowering, lightly trim long or untidy stems and remove dead, weak, or crossing growth. Avoid cutting too hard into old bare wood unless the plant is healthy and you are deliberately rejuvenating it.
Good airflow is important. Avoid crowding the shrub with dense plants on all sides, as still air and damp foliage can encourage fungal problems.
🌼 Companion Planting Guide
Native hibiscus pairs well with plants that enjoy good drainage, moderate fertility, and sunny to lightly shaded conditions. Good companions include native grasses, westringia, correas, grevilleas, scaevola, brachyscome, billy buttons, everlasting daisies, kangaroo paw, flax lily, tea-tree, paper daisies, saltbush, and small native pea flowers.
In a mixed garden bed, plant native hibiscus as a medium shrub layer, with grasses and small flowering plants in front. This creates a natural layered look and provides habitat for pollinators and small beneficial insects.
Flowering companions such as paper daisies, brachyscome, scaevola, billy buttons, and kangaroo paw help attract bees and other pollinators. Fine-leaved shrubs and grasses also soften the base of the plant and make the flowers stand out.
Avoid planting native hibiscus with very thirsty plants that need constant irrigation, or with heavy feeders that require rich fertiliser. Also avoid aggressive groundcovers that may smother young plants or compete heavily around the roots.
🧺 How to Harvest
Native hibiscus is usually harvested for flowers, light ornamental stems, and seed, rather than food. Some types have traditionally been used for edible or practical purposes, but plants should not be eaten unless they have been correctly identified as safe.
For cut flowers, harvest when blooms are freshly opened or just beginning to open. Use clean scissors or secateurs and place stems into water straight away. The flowers may not last as long as some commercial cut flowers, but they are beautiful for short displays.
For foliage or light decorative stems, cut only from healthy, established plants. Make cuts just above a leaf joint to encourage new branching. Avoid removing too much growth from a young shrub.
For seed, allow flowers to develop into seed capsules. These capsules should be left on the plant until they begin to dry and brown. Harvest before they split fully and drop seed.
⚠️ Common Issues and Fixes
| Issue | Likely Cause | Fix |
|---|---|---|
| Poor germination | Hard seed coat, no pre-treatment, old seed, seed buried too deeply | Scarify seed, soak overnight, sow shallowly, use fresh seed |
| Seed rotting | Mix too wet, poor drainage, soaking too long | Use free-draining mix, water lightly, avoid soggy conditions |
| Seedlings collapsing | Damping off from excess moisture or poor airflow | Use clean seed mix, avoid overcrowding, improve airflow |
| Slow seedling growth | Cool conditions, weak light, poor mix, root disturbance | Provide bright light, use quality mix, pot on gently |
| Yellowing leaves | Overwatering, poor drainage, nutrient imbalance | Check soil moisture, improve drainage, feed lightly with suitable fertiliser |
| Few flowers | Too much shade, excess nitrogen, lack of pruning | Increase light, reduce rich feeding, prune lightly after flowering |
| Leggy growth | Low light or no tip pruning | Move to brighter conditions, tip prune young plants |
| Leaf spots | Fungal disease from damp foliage and poor airflow | Improve spacing, water soil rather than leaves, remove affected leaves |
| Bud drop | Water stress, heat stress, root disturbance, sudden changes | Water consistently, mulch well, avoid disturbing roots |
| Chewed leaves | Caterpillars, beetles, grasshoppers, slugs or snails | Inspect regularly, hand-remove pests, protect young plants |
| Aphids on new tips | Soft new growth, low beneficial insect activity | Spray off with water, encourage ladybirds and hoverflies, avoid overfeeding |
| Plant wilting despite wet soil | Root stress from waterlogging | Improve drainage, reduce watering, plant on a mound if needed |
| Poor pot performance | Potting mix too wet, pot too small, weak drainage | Repot into free-draining mix, use a larger pot, check drainage holes |
🌾 Detailed Seed Saving Guide
Saving native hibiscus seed is simple once the plant is mature enough to flower and form capsules. Begin by choosing healthy, vigorous plants with strong flowering, good colour, clean foliage, and a pleasing shape. Avoid saving seed from weak, diseased, badly pest-affected, or poorly flowering plants.
Allow selected flowers to remain on the plant after they fade. They will form seed capsules that gradually mature and dry. Watch them closely as they turn brown, because dry capsules may split and release seed quickly.
To avoid losing seed, place a small paper bag or fine mesh bag over ripening capsules. This allows airflow while catching seed if the capsule opens. Another method is to harvest capsules when they are mostly dry but not yet split, then finish drying them indoors.
Place harvested capsules in a paper bag or on a clean tray in a dry, airy, shaded place. Once fully dry, gently break the capsules open and remove the seed. Discard damaged, shrivelled, mouldy, or insect-chewed seed.
Spread the seed in a single layer for several more days to make sure it is completely dry. Do not store seed while it is even slightly damp, as it may mould in storage.
Store dried seed in a labelled paper envelope or airtight jar. Include the plant name, flower colour, parent plant notes, and year collected. Keep it in a cool, dark, dry place. A small moisture absorber can be placed in the storage jar if conditions are humid.
Before sowing saved seed, use scarification and soaking to improve germination. Saved seed may germinate unevenly, so sow a little extra and keep only the strongest seedlings.
For better long-term results, save seed from several strong plants rather than just one. This helps maintain vigour and gives a broader range of healthy seedlings for future planting.
🌟 Final Thoughts
Native hibiscus is a graceful, colourful, and rewarding shrub that brings beauty, pollinators, and soft structure to the garden. It is not difficult to grow, but it performs best when its main needs are met: pre-treated seed, free-draining soil, full sun to light shade, careful watering, light feeding, and regular gentle pruning.
Starting seed in trays, tubes, or small pots is the most reliable method because young seedlings are easier to protect and manage. Once established, native hibiscus becomes a resilient and attractive garden plant that offers beautiful flowers, habitat value, and seed for future growing.
Postage Charge
Orders under $35 attract a $4.95 shipping charge. Orders $35 and above have free shipping.
Order Times
Seed orders are normally dispatched within three business days. You will receive an email when seeds are mailed out.
Postage Days
Seeds are mailed out Tuesday to Friday at 1pm. Except for the Friday of long weekends.
Postage Times
WA 2-3 Days: SA,NT 3-5 Days: NSW, ACT, QLD, VIC: 5-7 Days
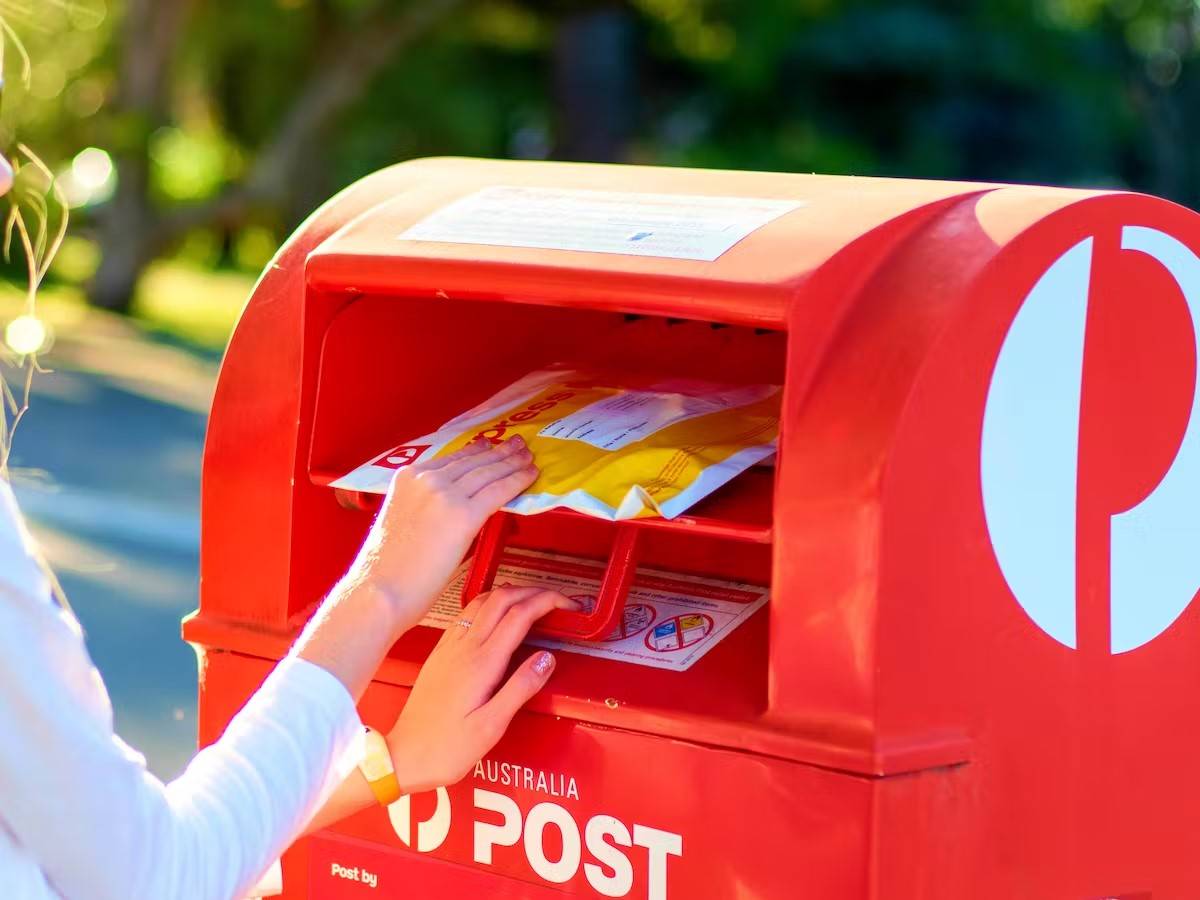
Carrier
We use Australia Post Letter Postage for the majority of orders
Not only are our seeds packed in recycled paper envelopes, we keep the theme going when we post out website orders. To protect your seeds from moisture and the letter box munchers (snails), we use a very special plastic free material made from plants. They are then put into recycled mailing envelopes. Green all the way ????????
Delivery Guarantee
We take great care to make sure your seeds arrive safely. If your order is lost or damaged in transit, we’ll happily send a replacement. Unfortunately, we can’t replace or refund orders that arrive later than the estimated delivery date, as delays can sometimes occur that are outside our control.
Please note that all dispatch and delivery times listed are estimates only. While we do our best to post promptly, delivery timeframes can vary due to postal service delays, weather events, or other unforeseen circumstances. We’re unable to take responsibility for any loss, damage, or cost that results from a late delivery.
An order is not considered missing until at least 20 business days have passed from the postage date. You’ll receive an email once your seeds have been posted, letting you know they’re on their way. If you don’t see it in your main inbox, please check your Spam or Promotions folders as sometimes our emails like to hide there.

Reviews
There are no reviews yet