


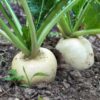


Turnip Snowball
$6.59
Brassica Rapa
- Seed Count 100
- Sweet, Mild Flavour
- Hardy Biennial
Out of stock
Email when stock available
Description
Turnip Snowball is a very popular first-class, globe variety with solid flesh and a juicy, sweet, mild flavour. It is an heirloom turnip that was introduced before 1885. Pure white flesh as its name suggests, Snowball is best harvested when no larger than a tennis ball and can also be enjoyed when much smaller.
Snowball is superb for both table and exhibition, they are a fast crop, being ready in just five to eight weeks from sowing. It will yield a good supply from early summer to early winter, and the tops make most nutritious and tasty greens.
Large woody turnips of old have mainly been replaced with smaller white varieties that are delicious grated raw into a salad or as a welcome side dish, leaving the swedes to take over in the stew department!
| Method: Sow direct or seedlings | Soil Temp: 12°C - 30°C |
| Cool Mountain: Sep - May | Position: Full sun |
| Arid: Feb - Aug | Row Spacing: 20cm apart |
| Temperate: Sep - May | Planting Depth: 5mm |
| Sub Tropical: Aug - May | Harvest: 60 Days |
| Tropical: Apr - Jun | Plant Height: 20cm |
🌱 Turnip Grow Guide
Turnip is a fast-growing, productive root vegetable valued for both its crisp swollen roots and nutritious leafy tops. It is one of the most useful crops for gardeners who want a quick harvest from a small space. The roots can be eaten raw when young and tender, roasted, steamed, mashed, added to soups, or used in stews, while the leaves can be cooked like other leafy greens.
Turnips grow best when they are kept moving steadily from seed to harvest. The aim is to produce smooth, tender roots before they become woody, bitter, or oversized. Good soil preparation, even moisture, and careful thinning make a major difference to the final crop.
🌿 Sowing in Trays vs Direct Sowing
Turnips can technically be started in trays, but direct sowing is the best method. They form an edible root directly below the seedling, and transplanting can disturb that root, causing forking, distortion, stunting, or poor development. For straight, smooth, evenly shaped turnips, sow the seed directly where the plants are to grow.
Prepare the bed first by removing weeds, stones, hard clods, and old roots. Rake the surface until it is fine and crumbly. Sow the seed shallowly in rows or small patches, then cover lightly with fine soil or seed-raising mix. Water gently so the seed stays in place. Once seedlings appear, thin them early so each plant has enough space to form a round root.
Tray sowing may be useful only when protection from pests is essential or when garden space is not ready. If using trays, choose deep cells, sow one or two seeds per cell, and transplant while seedlings are very young. Handle them gently and avoid bending the root. Even then, tray-grown turnips are usually less reliable than direct-sown plants.
Best choice: direct sowing is strongly recommended for turnips because it gives the best root shape, fastest establishment, and least disturbance.
💧 Seed Pre-Treatment
Turnip seed does not need special pre-treatment. There is no need to soak, chill, scarify, or prepare the seed before sowing.
The key is to use fresh seed, sow shallowly, and keep the soil evenly moist during germination. Turnip seed is small and should not be buried deeply. A light covering of soil is enough. If the soil surface dries out after sowing, germination may be patchy, so gentle, regular watering is important until seedlings are established.
☀️ Soil and Position
Turnips grow best in an open, sunny position with at least several hours of direct light each day. They will tolerate light shade, but too much shade can produce large leaves and smaller roots.
The ideal soil is loose, fertile, moisture-retentive, and well drained. Turnips dislike compacted soil because hard ground restricts root swelling and can cause misshapen roots. Before sowing, loosen the soil well and remove stones or debris that may block root growth.
Add compost or well-rotted organic matter before planting, but avoid fresh manure. Fresh manure and heavy nitrogen feeding can encourage leafy growth at the expense of roots and may cause rough, forked, or poor-quality turnips.
A slightly acidic to neutral soil is suitable. If soil is very acidic, turnips may struggle and can be more vulnerable to clubroot. Good drainage is essential, especially in heavier soils, as waterlogging can lead to rot and weak growth.
🌿 Care and Maintenance
Turnips need steady growth to produce tender roots. The most important care task is consistent watering. Dry soil followed by heavy watering can cause splitting, while prolonged dryness can make roots tough, woody, and strongly flavoured. Keep the soil evenly moist, especially while the roots are swelling.
Thin seedlings early. Crowded turnips compete for space and produce small or misshapen roots. For baby turnips, plants can be closer together. For larger roots, allow more room between plants. Thinnings can be used as tender greens.
Weed regularly, especially while seedlings are small. Turnips do not compete well with weeds in the early stages. Hand weed carefully so the developing roots are not disturbed.
Feeding should be moderate. If the soil was prepared with compost, little extra fertiliser is usually needed. A balanced organic fertiliser can be used if growth is pale or slow, but avoid overfeeding with nitrogen-rich products. Too much nitrogen produces lush tops and poor roots.
Mulch lightly once seedlings are established to help conserve moisture and suppress weeds. Keep mulch thin around young plants so it does not smother them.
🥕 Companion Planting Guide
Turnips grow well with many leafy greens, herbs, and vegetables that do not crowd their roots. Good companions include lettuce, spinach, peas, beans, onions, garlic, chives, celery, dill, mint in a contained pot, chamomile, calendula, nasturtium, and marigold.
Aromatic herbs and flowers can help attract beneficial insects and add diversity to the garden. Flowers such as calendula, nasturtium, and marigold are useful around vegetable beds because they support pollinators and beneficial predators.
Avoid planting turnips too close to other root crops if space is limited, as they compete underground. Also avoid crowding them with large, spreading plants that shade the bed. Turnips are related to crops such as cabbage, broccoli, cauliflower, kale, radish, and mustard greens, so it is best not to grow them repeatedly in the same spot. Rotation helps reduce pest and disease build-up.
✂️ How to Harvest
Turnips are best harvested while the roots are still young, smooth, and tender. Smaller roots usually have the sweetest flavour and finest texture. Large, overmature roots can become woody, bitter, fibrous, or hollow.
To harvest, gently loosen the soil around the root with your hand or a small fork, then pull the plant from the base of the leaves. Avoid yanking from the top if the soil is hard, as the leaves may break away.
The leaves can also be harvested. Pick outer leaves while the plant is growing, leaving the centre intact if you still want the root to develop. For a full root harvest, the greens can be cut off and cooked separately.
After harvesting, remove the leafy tops if storing the roots. Leaves draw moisture from the root and can cause it to soften quickly. Store roots in a cool place, and use the greens soon after picking for the best quality.
⚠️ Common Issues and Fixes
| Issue | Likely Cause | Fix |
|---|---|---|
| Poor germination | Seed buried too deeply, old seed, dry soil, or crusted surface | Sow shallowly, use fresh seed, keep soil evenly moist, and cover with fine soil |
| Long thin roots | Overcrowding, poor light, or compacted soil | Thin seedlings early, grow in a brighter position, and loosen soil before sowing |
| Forked or misshapen roots | Stones, compacted soil, fresh manure, or transplant shock | Direct sow, remove stones, avoid fresh manure, and prepare a fine seedbed |
| Small roots with lots of leaves | Too much nitrogen or overcrowding | Reduce high-nitrogen feeding and thin plants to proper spacing |
| Woody or bitter roots | Slow growth, dry soil, or late harvesting | Keep moisture steady and harvest while roots are young and tender |
| Split roots | Uneven watering, especially dryness followed by heavy moisture | Water consistently and mulch lightly to stabilise soil moisture |
| Hollow roots | Overmaturity, irregular growth, or stress | Harvest earlier and keep growth steady |
| Flea beetle holes in leaves | Small jumping beetles feeding on young leaves | Use fine insect netting, keep plants growing strongly, and remove weeds nearby |
| Caterpillar damage | Moth or butterfly larvae chewing leaves | Inspect leaves regularly, handpick caterpillars, and use insect netting |
| Aphids | Soft new growth and pest pressure | Spray off with water, encourage ladybirds and lacewings, and avoid overfeeding |
| Clubroot | Soil-borne disease favoured by acidic, poorly drained soil | Rotate crops, improve drainage, avoid moving infected soil, and adjust very acidic soil |
| Root rot | Waterlogged soil or poor drainage | Improve drainage, avoid overwatering, and grow in raised beds if needed |
🌾 Detailed Seed Saving Guide
Saving seed from turnips takes more time than harvesting roots because the plant must flower and set seed. Choose strong, healthy plants with the root shape, vigour, flavour, and leaf quality you want to preserve. Do not save seed from weak, diseased, misshapen, or early-bolting plants unless you specifically want those traits repeated.
Turnips are cross-pollinated by insects, so seed purity can be affected if compatible crops are flowering nearby. They can cross with some closely related leafy and root crops of the same species group, so keep seed plants separated from other compatible flowering plants if you want reliable seed. For casual home seed saving, some variation may be acceptable, but for consistent results, isolation is important.
To save seed, leave selected plants in the ground and allow them to send up tall flowering stems. The plant will produce yellow flowers followed by slender seed pods. Keep the seed plants watered enough to remain healthy, but avoid excessive feeding. Too much rich growth can make plants soft and prone to falling over.
As the pods mature, they will turn from green to tan or brown. Wait until most pods are dry, but do not leave them so long that they shatter and drop seed. Cut the dry stems and place them upside down in a paper bag or on a clean tray in a dry, shaded, airy place.
Once fully dry, rub or gently crush the pods to release the seeds. Separate the seed from the chaff using a sieve, light blowing, or careful hand sorting. Make sure the seeds are completely dry before storage.
Store turnip seed in a labelled paper envelope or airtight jar in a cool, dark, dry place. Label it with the crop name and collection date. Properly dried and stored seed can remain useful for several years, though fresher seed generally germinates more strongly.
🌼 Final Thoughts
Turnip is a practical and rewarding crop for gardeners who want quick food from a small area. It offers two harvests from one plant: tender roots and nutritious greens. The secret to success is simple: direct sow, thin early, keep moisture steady, and harvest before roots become oversized.
For the best results, focus on soil preparation before sowing. Loose, stone-free, moderately fertile soil will give smoother roots, while steady watering will improve flavour and texture. Turnips are not difficult, but they do not like neglect during early growth. With good spacing, even moisture, and regular harvesting, they can be one of the most satisfying root vegetables to grow.
3 reviews for Turnip Snowball
| 5 star | 66% | |
| 4 star | 33% | |
| 3 star | 0% | |
| 2 star | 0% | |
| 1 star | 0% |
Postage Charge
Orders under $35 attract a $4.95 shipping charge. Orders $35 and above have free shipping.
Order Times
Seed orders are normally dispatched within three business days. You will receive an email when seeds are mailed out.
Postage Days
Seeds are mailed out Tuesday to Friday at 1pm. Except for the Friday of long weekends.
Postage Times
WA 2-3 Days: SA,NT 3-5 Days: NSW, ACT, QLD, VIC: 5-7 Days
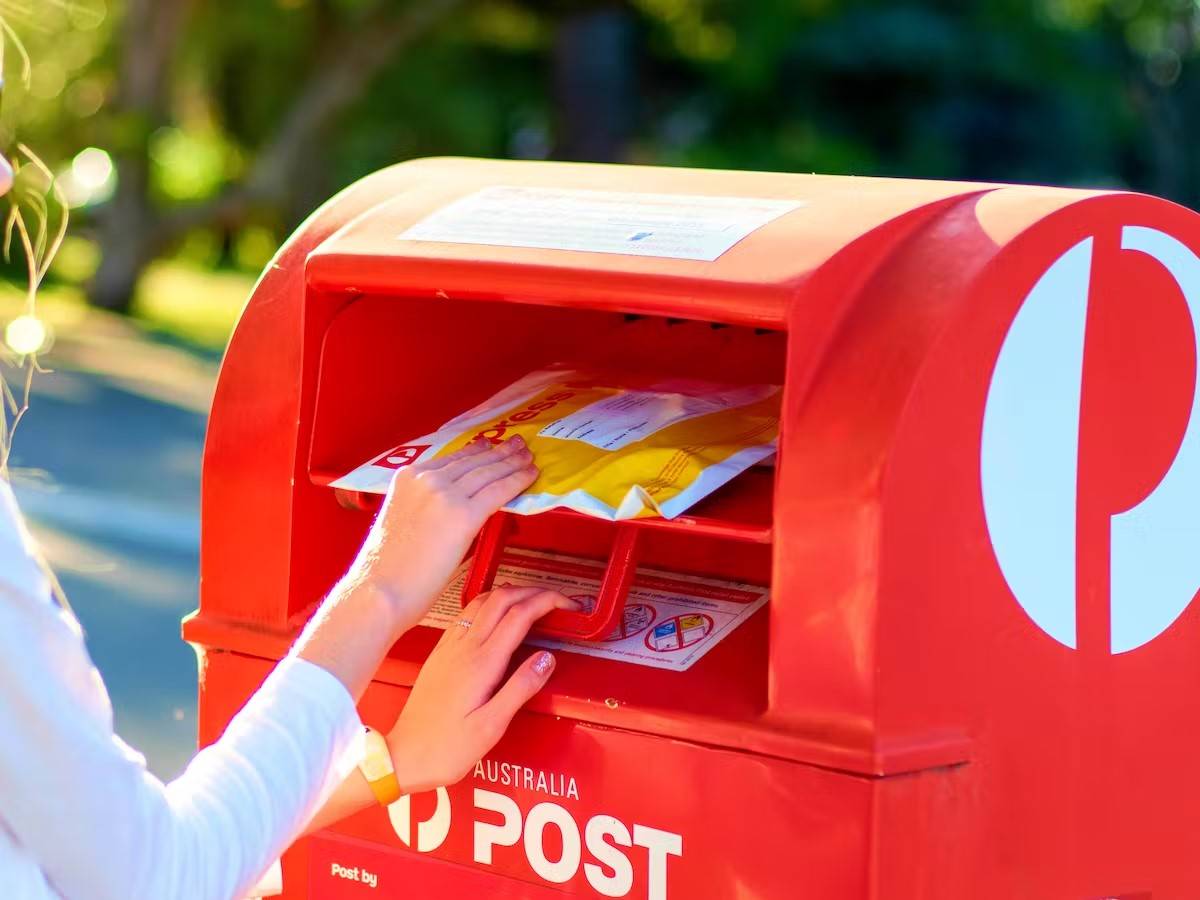
Carrier
We use Australia Post Letter Postage for the majority of orders
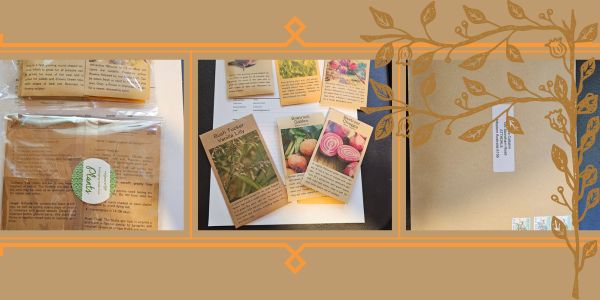
Not only are our seeds packed in recycled paper envelopes, we keep the theme going when we post out website orders. To protect your seeds from moisture and the letter box munchers (snails), we use a very special plastic free material made from plants. They are then put into recycled mailing envelopes. Green all the way ????????
Delivery Guarantee
We take great care to make sure your seeds arrive safely. If your order is lost or damaged in transit, we’ll happily send a replacement. Unfortunately, we can’t replace or refund orders that arrive later than the estimated delivery date, as delays can sometimes occur that are outside our control.
Please note that all dispatch and delivery times listed are estimates only. While we do our best to post promptly, delivery timeframes can vary due to postal service delays, weather events, or other unforeseen circumstances. We’re unable to take responsibility for any loss, damage, or cost that results from a late delivery.
An order is not considered missing until at least 20 business days have passed from the postage date. You’ll receive an email once your seeds have been posted, letting you know they’re on their way. If you don’t see it in your main inbox, please check your Spam or Promotions folders as sometimes our emails like to hide there.
See all our verified customer reviews on our official CusRev profile.
See all our verified customer reviews on our official CusRev profile.
See all our verified customer reviews on our official CusRev profile.