
")


Brussels Sprout Groninger
$4.95
Brassica Oleracea Gemmifera
- Seed Count 200
- Easy to Grow
- Annual
In stock
Description
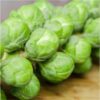
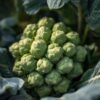
Brussels Sprouts Groniger is a good choice for anyone trying Brussels sprouts for the first time, It produces medium to small sprouts that are neat, well formed, and easy to use in the kitchen. The buttons develop in a tight, tidy way along the stalk, giving that classic brussels sprout.
Some sprouts can turn strong or lose their sweetness when conditions are less than ideal, but this one stays pleasantly mild. It can handle a light frost, and like the best winter vegetables, the cold only improves it. Chilly conditions help bring out a sweeter, nuttier flavour, giving the sprouts a depth that feels made for hearty seasonal cooking.
Once harvested, they store well with a little care. To help maintain moisture and freshness, place them in the vegetable crisper in the refrigerator and keep them on the stalks until you are ready to use them. Brussels sprouts have long been valued not only as a winter vegetable, but also for their nutritional goodness. They are believed to have potent anticancer properties and are an excellent source of protein, vitamin C, and vitamin K.
Altogether, this is a variety with real everyday usefulness. It is easy to grow, dependable in production, forgiving for beginners, and rewarding in both flavour and appearance. For Australian gardeners looking to fill the cool months with something productive, wholesome, and genuinely enjoyable to eat, Brussels Sprouts Groniger is a very good choice.
| Method: Start in trays | Soil Temp: 7°C - 30°C |
| Cool Mountain: Oct - Feb | Position: Full sun |
| Arid: Nov - Apr | Row Spacing: 50cm apart |
| Temperate: Sep - May | Planting Depth: 5 mm |
| Sub Tropical: Not Recommended | Harvest: 105 days |
| Tropical: Not Recommended | Plant Height: 20cm |
🥬 Brussels Sprouts Grow Guide
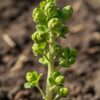
Brussels sprouts are a rewarding leafy vegetable grown for the small cabbage-like sprouts that form along a tall central stem. They are a patient gardener’s crop, taking longer than many vegetables, but they can provide a generous harvest when grown with fertile soil, steady moisture, strong light, and good pest protection.
The plant grows upward, forming a thick stem with large leaves. The sprouts develop in the leaf joints, starting lower on the stem and gradually forming higher up. A well-grown plant is sturdy, productive, and impressive in the garden, but it needs space and consistent care to produce firm, well-shaped sprouts.
🌱 Sowing in Trays Versus Direct Sowing
Brussels sprouts can be direct sown, but sowing in trays is usually the best method. The seedlings are vulnerable to slugs, snails, caterpillars, birds, and other pests, so raising them in trays gives better protection during the early stage. Tray sowing also allows you to select the strongest seedlings and plant them out with good spacing.
To sow in trays, use a quality seed-raising mix and sow seed about 5 mm deep. Cover lightly, water gently, and keep the mix evenly moist but not soggy. Once seedlings have several true leaves and are sturdy enough to handle, transplant them into their final position.
When planting out, firm the soil gently around each seedling. Brussels sprouts need a stable root system because the mature plants become tall and top-heavy. Loose planting can lead to weak anchoring and smaller sprouts.
Direct sowing can work in a fine, weed-free bed, but it is less reliable. Seedlings need early thinning, careful watering, and pest protection from the beginning. For most gardeners, tray sowing is preferred because it gives stronger plants, better spacing, and fewer early losses.
🌾 Seed Pre-Treatment
Brussels sprouts seed does not require special pre-treatment. There is usually no need for soaking, chilling, or scarifying.
Fresh seed normally germinates well when sown shallowly into clean, moist seed-raising mix. Avoid burying the seed too deeply, as this can delay germination. Also avoid waterlogged mix, as constantly wet conditions can cause seed rot or seedling collapse.
The most important requirements are fresh seed, shallow sowing, steady moisture, and good airflow.
🌞 Soil and Position
Brussels sprouts grow best in full sun with fertile, firm, well-drained soil. Strong light supports sturdy stems, healthy leaves, and firm sprout formation. In too much shade, plants may become tall, weak, and less productive.
The soil should be rich, moisture-retentive, and free-draining. Brussels sprouts are heavy feeders, so prepare the bed well before planting. Mix in compost, aged manure, worm castings, or well-rotted organic matter to create a fertile root zone.
The soil should be firm enough to hold the plant upright. Very loose soil can allow plants to rock in wind, which may weaken growth and reduce sprout quality. After planting, press soil gently around the roots to secure the seedling.
Avoid waterlogged soil, as it can lead to yellowing, root disease, and weak plants. If your soil is sandy, add compost to improve moisture retention. If your soil is heavy clay, improve structure with compost and plant slightly raised if drainage is poor.
Brussels sprouts can grow in large containers, but they need a deep, stable pot with drainage holes. A small pot is not suitable because the plants are tall, hungry, and thirsty. Use a premium potting mix and keep moisture consistent.
💧 Care and Maintenance
Brussels sprouts need steady watering, regular feeding, firm support, and close pest monitoring. Keep the soil evenly moist, especially while the stem is developing and sprouts are forming. Dry stress can lead to loose, small, or poorly shaped sprouts.
Mulch around plants to conserve moisture, suppress weeds, and keep the root zone stable. Keep mulch slightly away from the stem to reduce the risk of rot.
Feed regularly with compost, worm tea, liquid seaweed, fish emulsion, or a balanced vegetable fertiliser. Brussels sprouts need enough nutrition to build strong leaves and stems before sprout formation. Avoid excessive nitrogen late in growth, as it can encourage leafy, loose sprouts rather than firm buttons.
Because plants can become tall and heavy, staking may be needed in windy positions. Use a sturdy stake and soft ties to support the main stem without cutting into it.
Remove yellowing lower leaves as sprouts develop. This improves airflow and makes harvesting easier. Do not strip too many healthy leaves at once, as the plant needs foliage to feed the developing sprouts.
Some gardeners remove the growing tip once the lower sprouts have formed well. This can help direct energy into sprout development, but it should only be done when the plant is already strong and productive.
Pest protection is very important. Fine insect netting is one of the best ways to protect plants from caterpillars and other chewing pests. Check leaf undersides regularly for eggs and young caterpillars.
🐝 Companion Planting Guide
Brussels sprouts grow well with companions that attract beneficial insects, improve garden diversity, and make good use of space around the tall plants.
Good companions include onions, spring onions, chives, leeks, celery, beetroot, lettuce, spinach, silverbeet, carrots, potatoes, dill, coriander, parsley, thyme, sage, rosemary, calendula, alyssum, marigold, chamomile, yarrow, and nasturtium.
Alyssum, calendula, coriander, dill, parsley, yarrow, and chamomile are especially useful because their flowers attract hoverflies, tiny wasps, bees, and other beneficial insects. These insects help support a healthier garden balance.
Aromatic herbs such as thyme, sage, and rosemary can be useful nearby, but they prefer drier soil than Brussels sprouts. Keep their watering needs separate where possible.
Avoid planting Brussels sprouts too close to other heavy-feeding crops unless the soil is very fertile and spacing is generous. Also avoid crowding them with large spreading plants, as Brussels sprouts need airflow, light, and room for their tall stems.
✂️ How to Harvest
Harvest Brussels sprouts when the small sprouts are firm, tight, and well-sized. The lower sprouts usually mature first. Pick from the bottom of the stem upward as the plant continues developing.
To harvest, twist the sprout gently sideways until it snaps off, or cut it cleanly with a small knife. Remove yellowing leaves below harvested sprouts to keep the stem tidy and improve airflow.
Do not wait until sprouts become loose, open, or yellowing. Overmature sprouts can become strong-flavoured and less pleasant in texture.
The top leafy crown can also be harvested once the main sprout harvest is nearly finished. It can be cooked like a tender cabbage green.
For the best flavour and texture, use sprouts soon after picking. They can be steamed, roasted, sautéed, shredded into slaws, added to stir-fries, or cooked into hearty dishes.
⚠️ Common Issues and Fixes
| Issue | Likely Cause | Fix |
|---|---|---|
| Poor germination | Old seed, dry mix, seed buried too deeply | Use fresh seed, sow shallowly, keep evenly moist |
| Seedlings collapse | Overwatering, poor airflow, fungal disease | Use clean seed mix, avoid soggy conditions, improve ventilation |
| Leggy seedlings | Not enough light or overcrowding | Move to brighter light and thin or pot on early |
| Slow growth | Poor soil, low nutrients, dry stress, root disturbance | Improve soil, water consistently, feed regularly |
| Plants fall over | Loose soil, wind, weak roots, tall growth | Firm soil at planting and stake plants if needed |
| Small sprouts | Poor feeding, dry stress, overcrowding, weak plants | Feed steadily, water evenly, space plants properly |
| Loose open sprouts | Too much nitrogen, stress, poor light, uneven growth | Reduce nitrogen-heavy feeding, improve light, water consistently |
| Sprouts yellowing | Overmaturity, poor airflow, nutrient stress | Harvest earlier, remove old leaves, feed lightly |
| Yellowing lower leaves | Old foliage, nutrient shortage, waterlogging | Remove old leaves, improve drainage, feed if needed |
| Purple-tinged leaves | Nutrient stress, root stress, poor growth | Improve soil fertility and keep plants growing steadily |
| Holes in leaves | Caterpillars, slugs, snails, or beetles | Inspect often, hand-pick pests, use fine insect netting |
| Caterpillars hidden in sprouts | Eggs laid before sprouts formed | Net early and check plants regularly |
| Aphids in sprout clusters | Dense growth, soft new growth, pest buildup | Hose off early, encourage beneficial insects, avoid excess nitrogen |
| Whitefly | Warm sheltered conditions and crowded plants | Improve airflow, use insect netting, remove badly affected leaves |
| Clubroot-like swelling | Soil-borne disease in affected beds | Rotate crops, improve drainage, avoid moving infected soil |
| Downy mildew | Damp leaves, poor airflow, crowded planting | Space plants well, water at soil level, remove affected leaves |
| Black rot-like leaf yellowing | Bacterial disease entering through leaf edges or damage | Remove affected plants, avoid overhead watering, rotate crops |
| Stem rotting near base | Wet soil, mulch against stem, poor airflow | Improve drainage, move mulch back, increase spacing |
🌰 Detailed Seed Saving Guide
Saving Brussels sprouts seed takes planning and patience because the plant must grow beyond the eating stage, flower, and form seed pods. This means you need to choose seed-saving plants before harvesting all the sprouts.
Select the strongest, healthiest plants with firm sprouts, sturdy stems, good spacing along the stalk, clean leaves, and no signs of disease. Avoid saving seed from weak plants, loose-sprouted plants, pest-prone plants, or plants that produced poorly.
Leave selected plants in the garden after the sprout harvest. The plant will send up flowering shoots with many small yellow flowers. These flowers are insect-pollinated and need access to bees and other pollinators.
Brussels sprouts can cross with closely related crops flowering nearby, including cabbage, broccoli, cauliflower, kale, and some Asian greens. For more predictable seed, allow only one compatible crop type to flower for seed in the area, or separate flowering crops by a generous distance.
After flowering, long slender pods will form. Leave the pods on the plant until they turn dry and brown. Watch them closely, because fully dry pods can split and drop seed. If wet weather threatens when pods are nearly dry, cut the stems and hang them upside down in a dry, shaded, airy place to finish drying.
When the pods are completely dry, place them in a paper bag or on a clean tray and crush them gently to release the seeds. Separate the small round seeds from the dry pod pieces by hand, with a sieve, or by gentle winnowing.
Spread the cleaned seed on paper for several more days to make sure it is completely dry. Store it in a labelled paper envelope or small airtight jar. Include the plant name, sprout quality notes, and collection date. Keep seed in a cool, dark, dry place.
For stronger future crops, save seed from several good plants rather than just one. This helps maintain vigour and gives you a better selection of seedlings.
🌿 Final Thoughts
Brussels sprouts are a long-growing but highly rewarding crop for gardeners who can provide rich soil, steady moisture, strong light, and good pest protection. They are best started in trays because seedlings are easier to protect and manage before planting out. No special seed pre-treatment is required.
Give Brussels sprouts fertile firm soil, regular feeding, consistent water, plenty of space, and support if needed. Protect plants early with fine netting, remove yellowing lower leaves, and harvest firm sprouts from the bottom upward. With patient care, Brussels sprouts can provide a satisfying harvest from tall, productive plants.
2 reviews for Brussels Sprout Groninger
| 5 star | 100% | |
| 4 star | 0% | |
| 3 star | 0% | |
| 2 star | 0% | |
| 1 star | 0% |
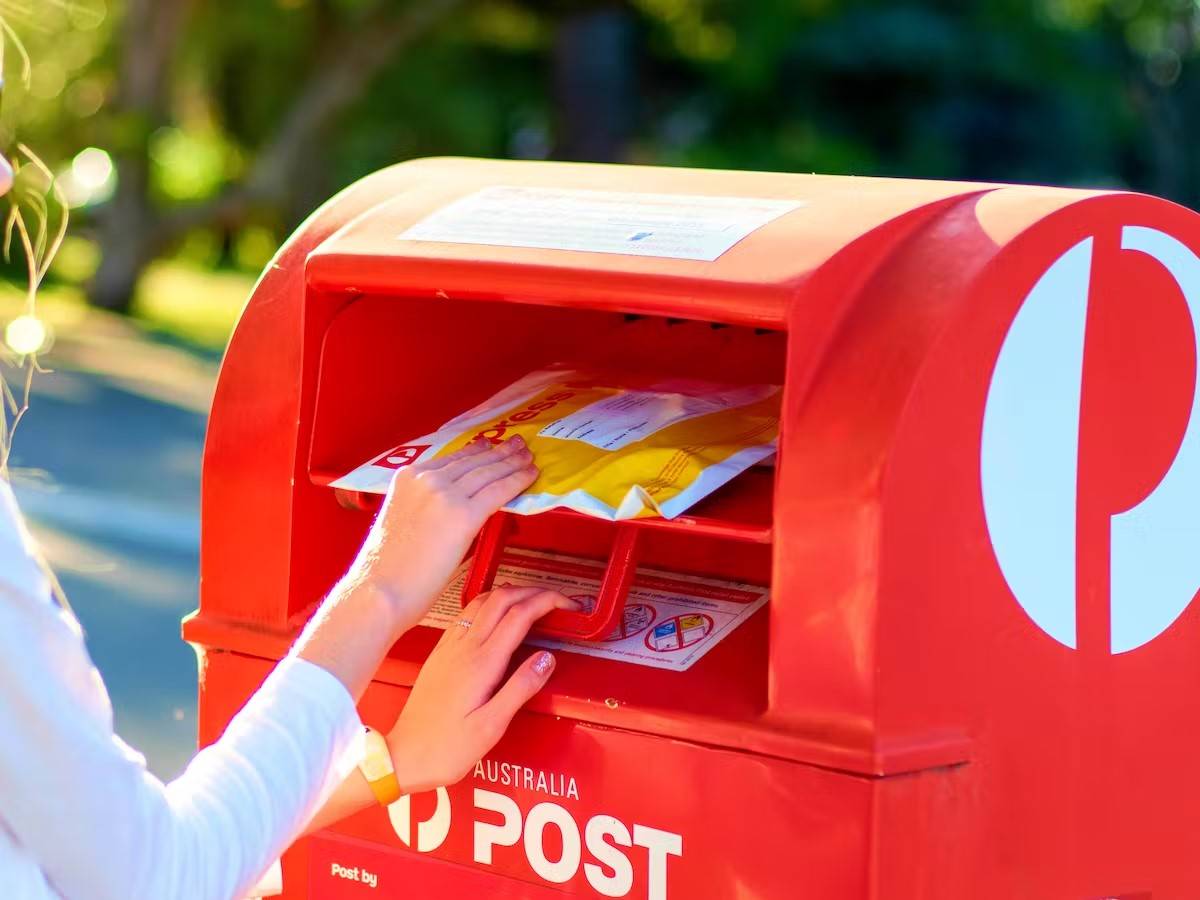
Postage Charge
Orders under $35 attract a $4.95 shipping charge. Orders $35 and above have free shipping.
Order Times
Seed orders are normally dispatched within three business days. You will receive an email when seeds are mailed out.
Postage Days
Seeds are mailed out Tuesday to Friday at 1pm. Except for the Friday of long weekends.
Postage Times
WA 2-3 Days: SA,NT 3-5 Days: NSW, ACT, QLD, VIC: 5-7 Days
Carrier
We use Australia Post Letter Postage for the majority of orders
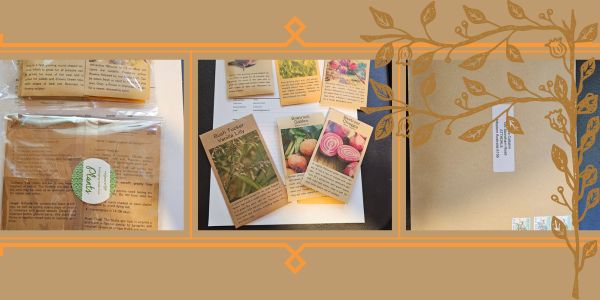
Not only are our seeds packed in recycled paper envelopes, we keep the theme going when we post out website orders. To protect your seeds from moisture and the letter box munchers (snails), we use a very special plastic free material made from plants. They are then put into recycled mailing envelopes. Green all the way ????????
Delivery Guarantee
We take great care to make sure your seeds arrive safely. If your order is lost or damaged in transit, we’ll happily send a replacement. Unfortunately, we can’t replace or refund orders that arrive later than the estimated delivery date, as delays can sometimes occur that are outside our control.
Please note that all dispatch and delivery times listed are estimates only. While we do our best to post promptly, delivery timeframes can vary due to postal service delays, weather events, or other unforeseen circumstances. We’re unable to take responsibility for any loss, damage, or cost that results from a late delivery.
An order is not considered missing until at least 20 business days have passed from the postage date. You’ll receive an email once your seeds have been posted, letting you know they’re on their way. If you don’t see it in your main inbox, please check your Spam or Promotions folders as sometimes our emails like to hide there.

See all our verified customer reviews on our official CusRev profile.
See all our verified customer reviews on our official CusRev profile.