How to harden off seedlings
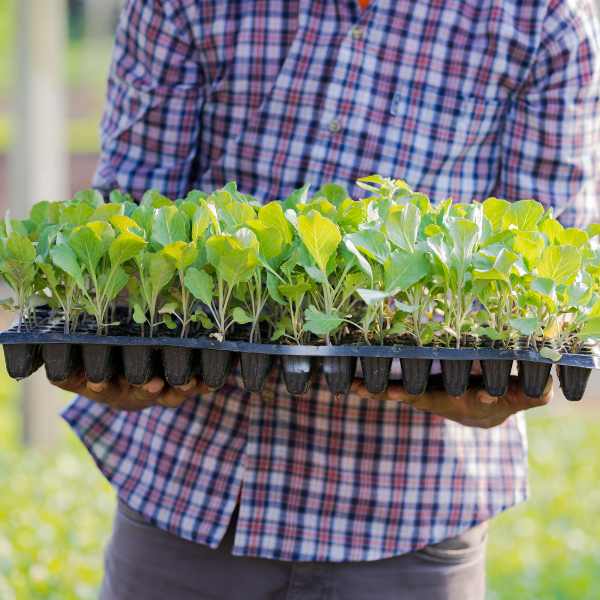
Hardening off is the process of preparing seedlings for the change from a protected environment to the outdoors, and it’s the key to avoiding transplant shock when planting out seedlings.
Seedlings need time to adjust from being grown inside in cozy conditions to being planted outside, where they will be at the mercy of the wind, direct sunlight, rain, and temperature changes.
What is ‘Hardening Off’?
Hardening off is the process of acclimatising seedlings to the outdoor environment. The climatic difference from the protected seedling growing position to the real outdoors can set your precious seedlings back if done suddenly, so taking things slowly is the best approach. Think of hardening off as like the orientation sessions a child does before starting school – it’s a gradual process of familiarisation that should make the big step into a new environment go more smoothly.
During hardening off seedlings undergo physiological changes to help them cope with direct sunlight, wind and temperature fluctuations. The water content of seedlings decreases and cell walls thicken, making them less ‘floppy’. Some plants also develop a tougher cuticle (or waxy coating) on their leaves.
Ideally, hardening off will be done over a few days, or even weeks. Place seedlings outside for a few hours in their final resting place, and then increase the duration each day, eventually keeping them overnight. If seedlings reside in a greenhouse, there’s no need to move them; instead, open the vents, doors, or flaps to allow the inside and outside temperatures to moderate and increase air circulation.
How Big do Seedlings Need to Be?
Wait until seedlings are large enough to transplant. “Ensure that seedlings have at least one to two sets of true leaves, are large enough to handle fairly easily, and won’t get ‘lost’ in the garden bed where they’ll be planted. The ideal height will vary, but as a rule of thumb seedlings that are 5cm to 10cm tall should be ready to be planted out.
Step by Step
Shade first: Put seedlings outside in a sheltered, shady position for two to three hours during the warmest part of the day. Choose a table or bench under house eaves, on a porch or even under a shady tree. Return them to their usual position before dusk.
Partial sunshine: Place the seedlings in a location with partial or dappled sunshine, again for two to three hours during the warmest part of the day. Monitor them to make sure the increase in natural light is not too much of a shock. If seedlings wilt, get that watering can out.
Full sun for a few hours: Now your seedlings are ready for a brief spell in full sun. Place them outside for a couple of hours, preferably in the morning sun. The hotter, afternoon sun can be too intense and is best avoided. Return them indoors in the afternoon and water them if the soil is dry.
A full day in direct sunlight: Move seedlings into full sun for four to six hours or longer. Keep an eye on them as they may need to be watered during the day if the weather is warm. Still bring the seedlings inside overnight.
Check nighttime temperatures: Most plants will tolerate a nighttime temperature that’s consistently 10°C or above. Some more temperature-sensitive seedlings, like cucumbers, squash, zucchini, tomatoes and capsicum will grow best with a nighttime temperature of at least 15°C.
Outside 24/7: Move seedlings outside but leave them in their pots or punnets. It’s ideal to leave them for two to three days before transplanting them into their permanent position.
Transplant time: Plant seedlings out into the garden, and water them in well to settle the roots. Then check daily for a few days and water at least two to three times in this first week.
The Lazy Option
If you’re short on time or not home during the day you can simplify the hardening off process. Wait until the nighttime temperatures are consistently 10°C to 15°C or higher. Move your seedlings to a protected place (on a porch, under house eaves or under a shade tree) and leave them for a week before planting out.
While this method won’t acclimatise your plants to direct sunlight, it will at least help them to adjust to cooler nights. You will still need to check on the seedlings to make sure they don’t dry out and aren’t being attacked by pests.
Tips & Tricks
Make sure the soil doesn’t dry out when the seedlings are outside. Sunlight and wind can dry out the soil in pots and punnets faster than indoors. Make it a habit to water before they go out or as they come back in.
Keep an eye out for natural pests. Watch for birds, slugs and snails and other animals that may see a tray of seedlings as a feast just for them. Birds have been known to systematically peck out entire trays of seedlings as though it’s an entertaining game! Protect seedling trays with netting, fleece or a makeshift wire cage if needed. A nighttime check is advisable too as the seedlings make very tasty meals for visiting slugs and snails. Visit with a torch and remove any visiting pests to the chicken coop or rubbish bin.
Keep pampering your seedlings for a couple of weeks after they’re transplanted. If they look like they’re suffering or if unexpectedly cold weather happens, you can protect them with temporary cloches or plastic bottles cut to fit. Remember to remove these in the morning to avoid the risk of fungal infections taking hold.

